With Bewick’s swans arriving early, and berries already appearing on holly bushes, popular folklore tells us that a hard winter is on the way. The swans have flown over 2,500 miles and taken eight weeks to get to the UK, and it is the earliest they have arrived since records began in 1963¹.
 With Bewick’s swans arriving early, and berries already appearing on holly bushes, popular folklore tells us that a hard winter is on the way. The swans have flown over 2,500 miles and taken eight weeks to get to the UK, and it is the earliest they have arrived since records began in 1963¹.
It’s not all doom and gloom for our industry by a long way though; now is the ideal time for plumbers and heating installers to get in touch with customers, whether by email, phone call or letter, to see if they want their heating system tested.
These checks should take no more than an hour, so installers can easily offer it as a fixed price service. Or why not offer it for free; while with the customer, see if there are other jobs they need doing?
Of course, with underfloor heating there is less to go wrong: no TRV’s to stick, nor lots of joints to potentially leak. Instead, following a simple eight-step checklist will help installers offer a great service to their customers, and could also avoid panicked phones call late on a Sunday evening as the title sequence for Downton starts!
Follow the Continental checklist here:
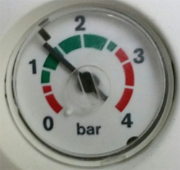
- Check the system pressure. It should be about 1 bar, although some boilers may require higher [ boiler pressure gauge]
- Check the pumps work. Turn the system on and create a demand for heat and check that the underfloor heating mixer pump is working by simply feeling it and checking that the manifold flow gauges are showing flow [CUFH manifold flow gauge]
- Check system interlock. With the system power on, and any overall system time clock set to on, turn each room’s thermostat down so there is no heat demand. The pump should go off. The boiler should not be firing (unless there is hot water demand or demand from a radiator circuit, in which case turn them off too). There should be no flow on any of the manifold flow gauges. [padlock]
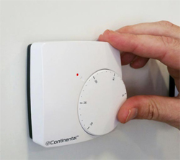
- Check each Zone switches on. Go to each room or thermostatic zone and turn the thermostat to its highest setting or until you hear it click on. Go back to the manifold. The mixer pump should now be running, the boiler should fire, and in about a minute or so the flow gauge should start to show flow. This means that zone/room works. Next, go back to it and turn the thermostat back down low to turn that room off. Go back to the manifold. The pump should have stopped. The flow gauge should be showing no (or reducing) flow, and the boiler should be off (although some will over run as a safety feature). Now do the same for the next room [rotary dial thermostat]
- Check the controls are set up correctly. Kids and spouses play with heating controls. Chat to your customer about what temperatures they want each room set to, and what times they want their heating to come on. Go around the controls checking the programming and showing the homeowner how to set them. Explain how reducing the temperature by a small amount and cutting back on the ‘on’ time can help reduce their fuel bills. If the controls allow, explain the concept of ‘set back’ to achieve higher energy efficiency. If the customer has simple rotary dial thermostats then perhaps chat to them about installing fully programmable or app-controlled thermostats, and how those could make their life simpler or save them money [mobile therM app]
- Look for leaks. Now turn the whole system on and let it run while you get a cup of tea (and enjoy some #ufhbiccies from Continental Underfloor). Give all the visible components a good thorough observation. You are looking for anything that doesn’t look right, or any sign of leaks from joints and valves
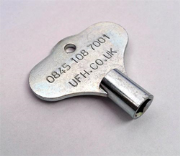
- Bleed the system. Now bleed the system in accordance with the instructions for the system you are working on. Most companies will have a manual or automatic bleed point on the manifold, but in a mixed system of UFH and radiators you will need to go to the high point on the system, usually a radiator in a bedroom. Of course, in a mixed system ensure that any TRV’s are opened [radiator key]
- Re-check the system pressure.


Continental Underfloor www.ufh.co.uk
References
¹http://www.telegraph.co.uk/news/weather/11926752/Britain-faces-longest-winter-in-50-years-after-earliest-ever-arrival-of-Siberian-swan.html